Paint consists of two components: pigment and vehicle. Pigment particles do not dissolve in the paint vehicle but are suspended in the liquid. Making paint means mixing solid and liquid components into a smooth paste.
Making paint is easier than you may think. You can start making small batches of oil paint with basic supplies, such as pigment, linseed oil, a spatula, and a clean, flat surface.
If you want to make enough paint that you can store, however, you will need a muller to grind the paint. Why grind pigment into paint? Although a powdered pigment may appear very fine, it is composed of aggregates of pigment particles. The aggregates clump together to form larger agglomerates and settle in the paint vehicle during storage. Grinding breaks up agglomerates of pigment particles and evenly disperses them in the paint vehicle, thereby wetting particle surfaces more thoroughly.
Note: All the materials and tools mentioned in this article are available from Natural Pigments, which you can purchase online.
Grinding Oil Paint
The amount of oil required for each pigment varies, so it is impossible to provide specific formulas for each color. Some pigments absorb more oil than others, so the following steps help you to prepare oil paint to the consistency you require.

Step 1: Place a small amount of pigment in a heap at the center of the surface. Make a small crater in the center of the heap.

Step 2: Add oil or paint medium to the pigment slowly—a few drops at a time. The less oil added in the beginning, the easier it will be to break up the agglomerates of pigment particles.

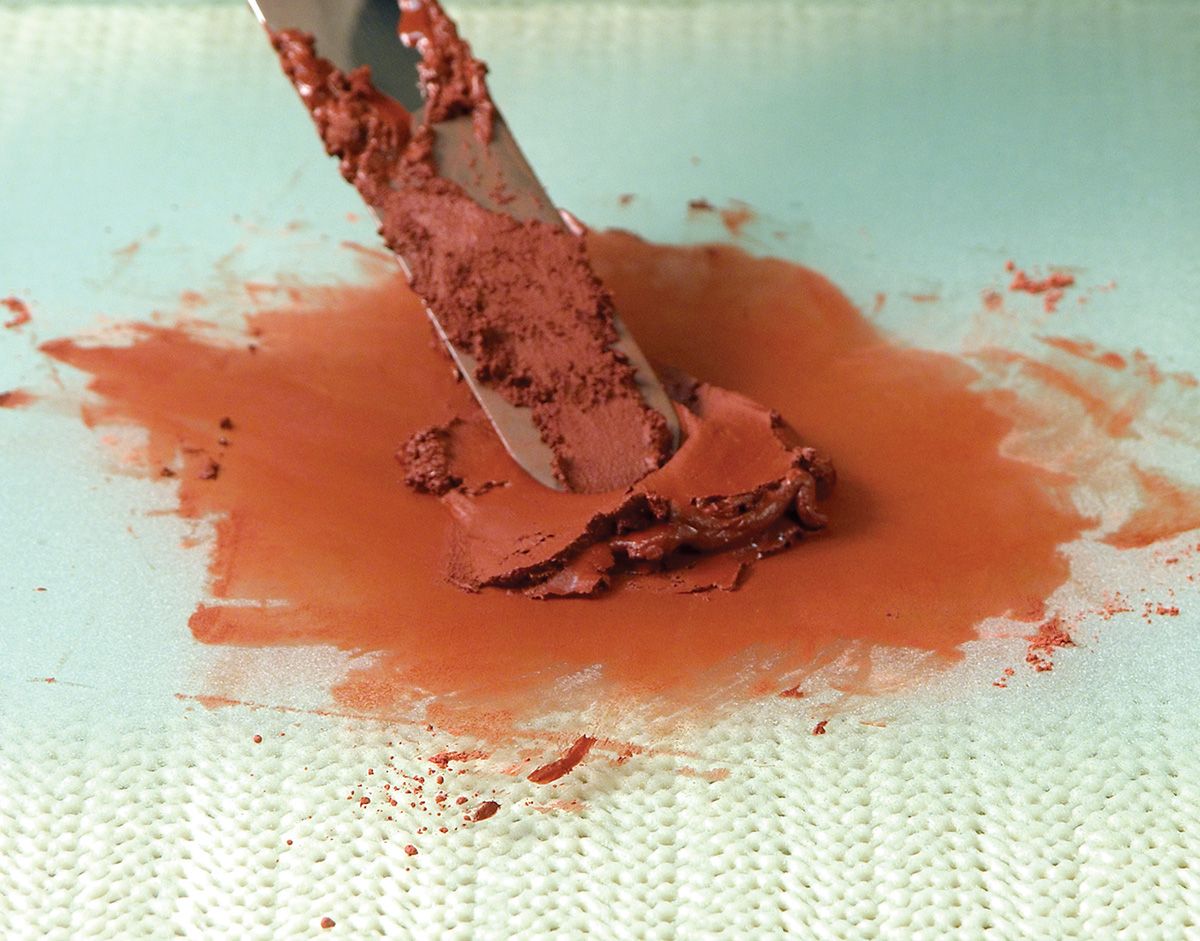
Step 3: Fold the pigment into the oil with the spatula. Continue to blend the pigment into the oil, applying pressure to the mixture as you mix it. The correct amount of oil is added when the mixture has the consistency of a stiff paste and appears dry. Initially, it is better to grind a stiff paste than one that is soft and runny.
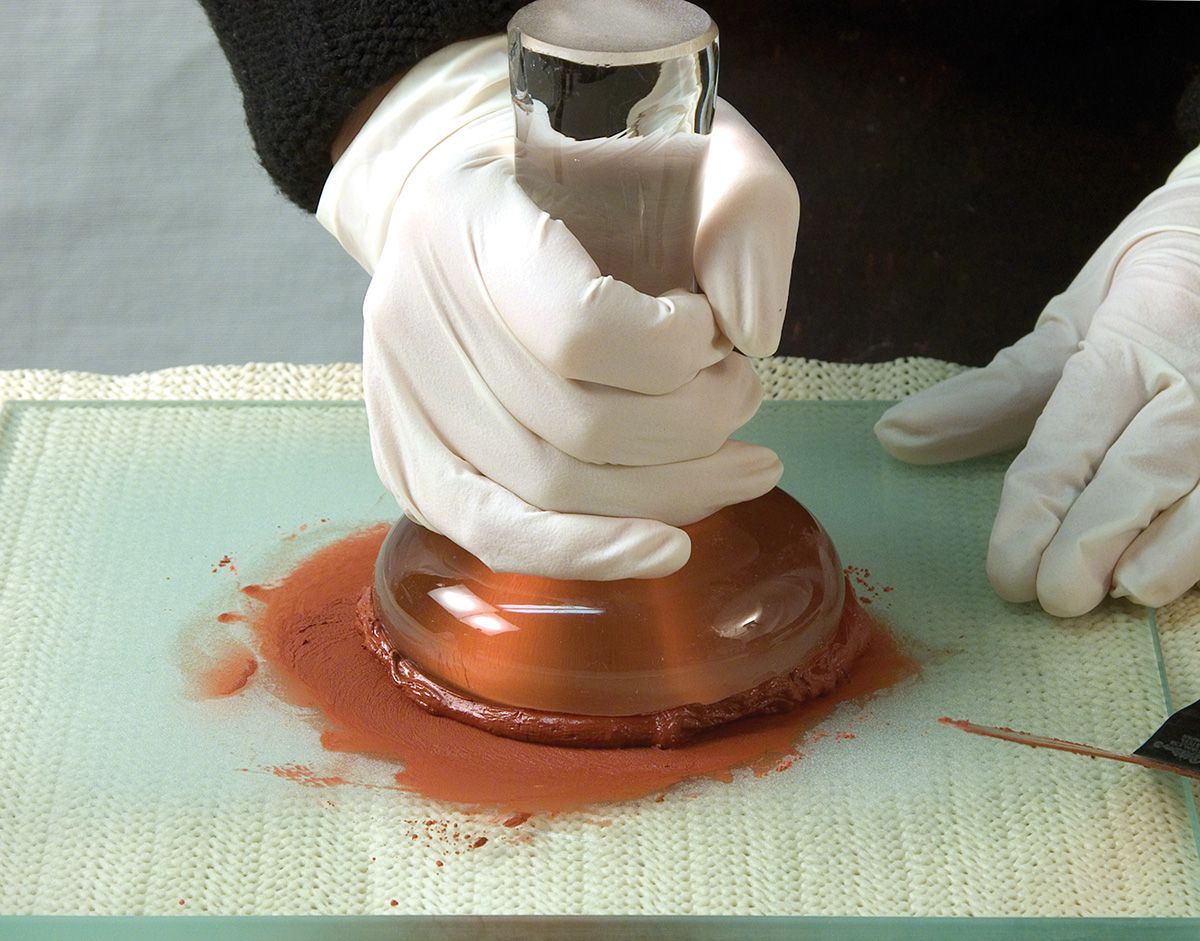
Step 4: Place the muller on top of the paste. Hold the muller firmly with the heel of your hand and thumb up. Move the muller in a circular motion outward from the center of the paste. Spread the paste in a thin layer as you grind. The more paste in contact with the surface of the plate and the flat bottom of the muller, the smoother the paste will be. The more you grind, the softer it becomes. Paste that is at first dry and stiff becomes wet and soft.
Step 5: Once the paste is spread out, collect it back to the center. Continue grinding with the muller.
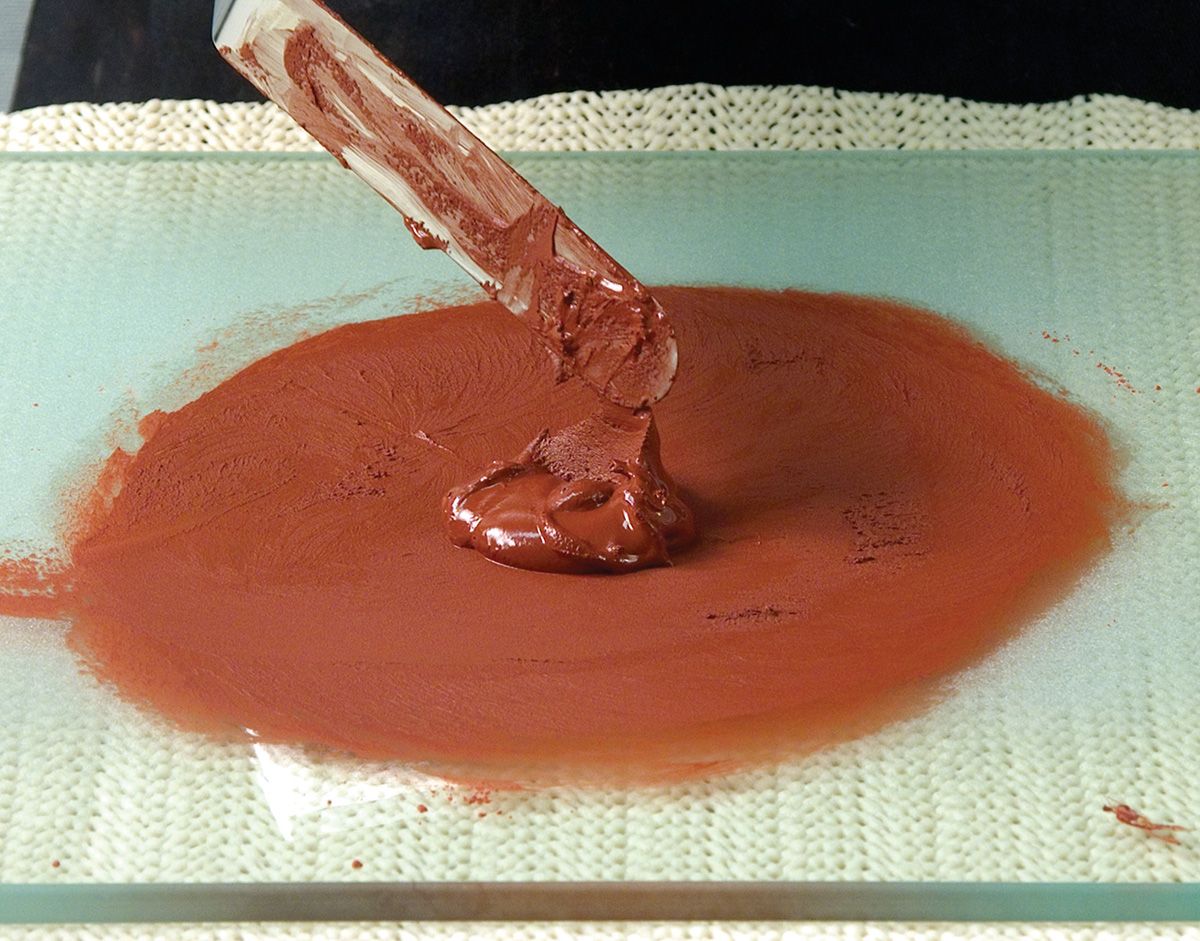
Step 6: If the paste becomes runny, thicken it by adding a small amount of pigment to the mixture. Combine the pigment with a spatula, then grind with the muller until smooth.
Step 7: When the paint has the consistency desired, it is ready to use or store.
Note: Remove accumulated paint from the sides of the muller with the spatula. Moving or lifting the muller from the grinding surface may be difficult. Using the spatula as a lever, raise the edge of the muller. Then slide the muller off the surface.
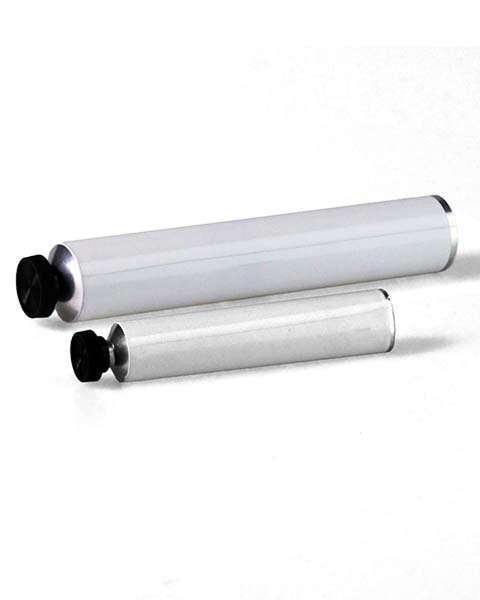
Storing Paint in Tubes

Step 1: Hold the tube with the cap pointing downward and the open end up. Using a narrow palette knife, pick up some paint and drop it into the tube.

Step 2: Scrape the paint off the knife onto the edge of the tube.

Step 3: Paint will accumulate at the open end of the tube. Grasp the tube between your forefinger and thumb. Gently tap it several times on a tabletop to settle the paint in the tube. Repeat steps 1–3.

Step 4: When the tube is filled to about two-thirds, close the end of the tube by pinching it between your fingers.

Step 5: Place the tube on a flat surface and flatten the tube end with the palette knife.

Step 6: Place the knife across the end of the tube. Bend the tube upward, creasing the tube at the edge of the palette knife.
Step 7: Repeat one or two times, folding the end of the tube onto itself.
Clean your tools with light vegetable oil or odorless mineral spirits, followed by warm water and soap. Remove caked-on paint by grinding the muller and surface with silicon carbide mixed with mineral spirits and washing with warm water and soap.

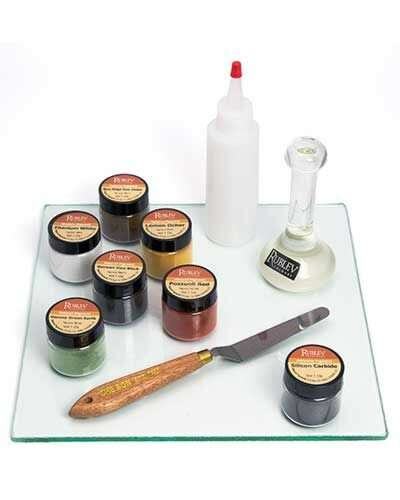
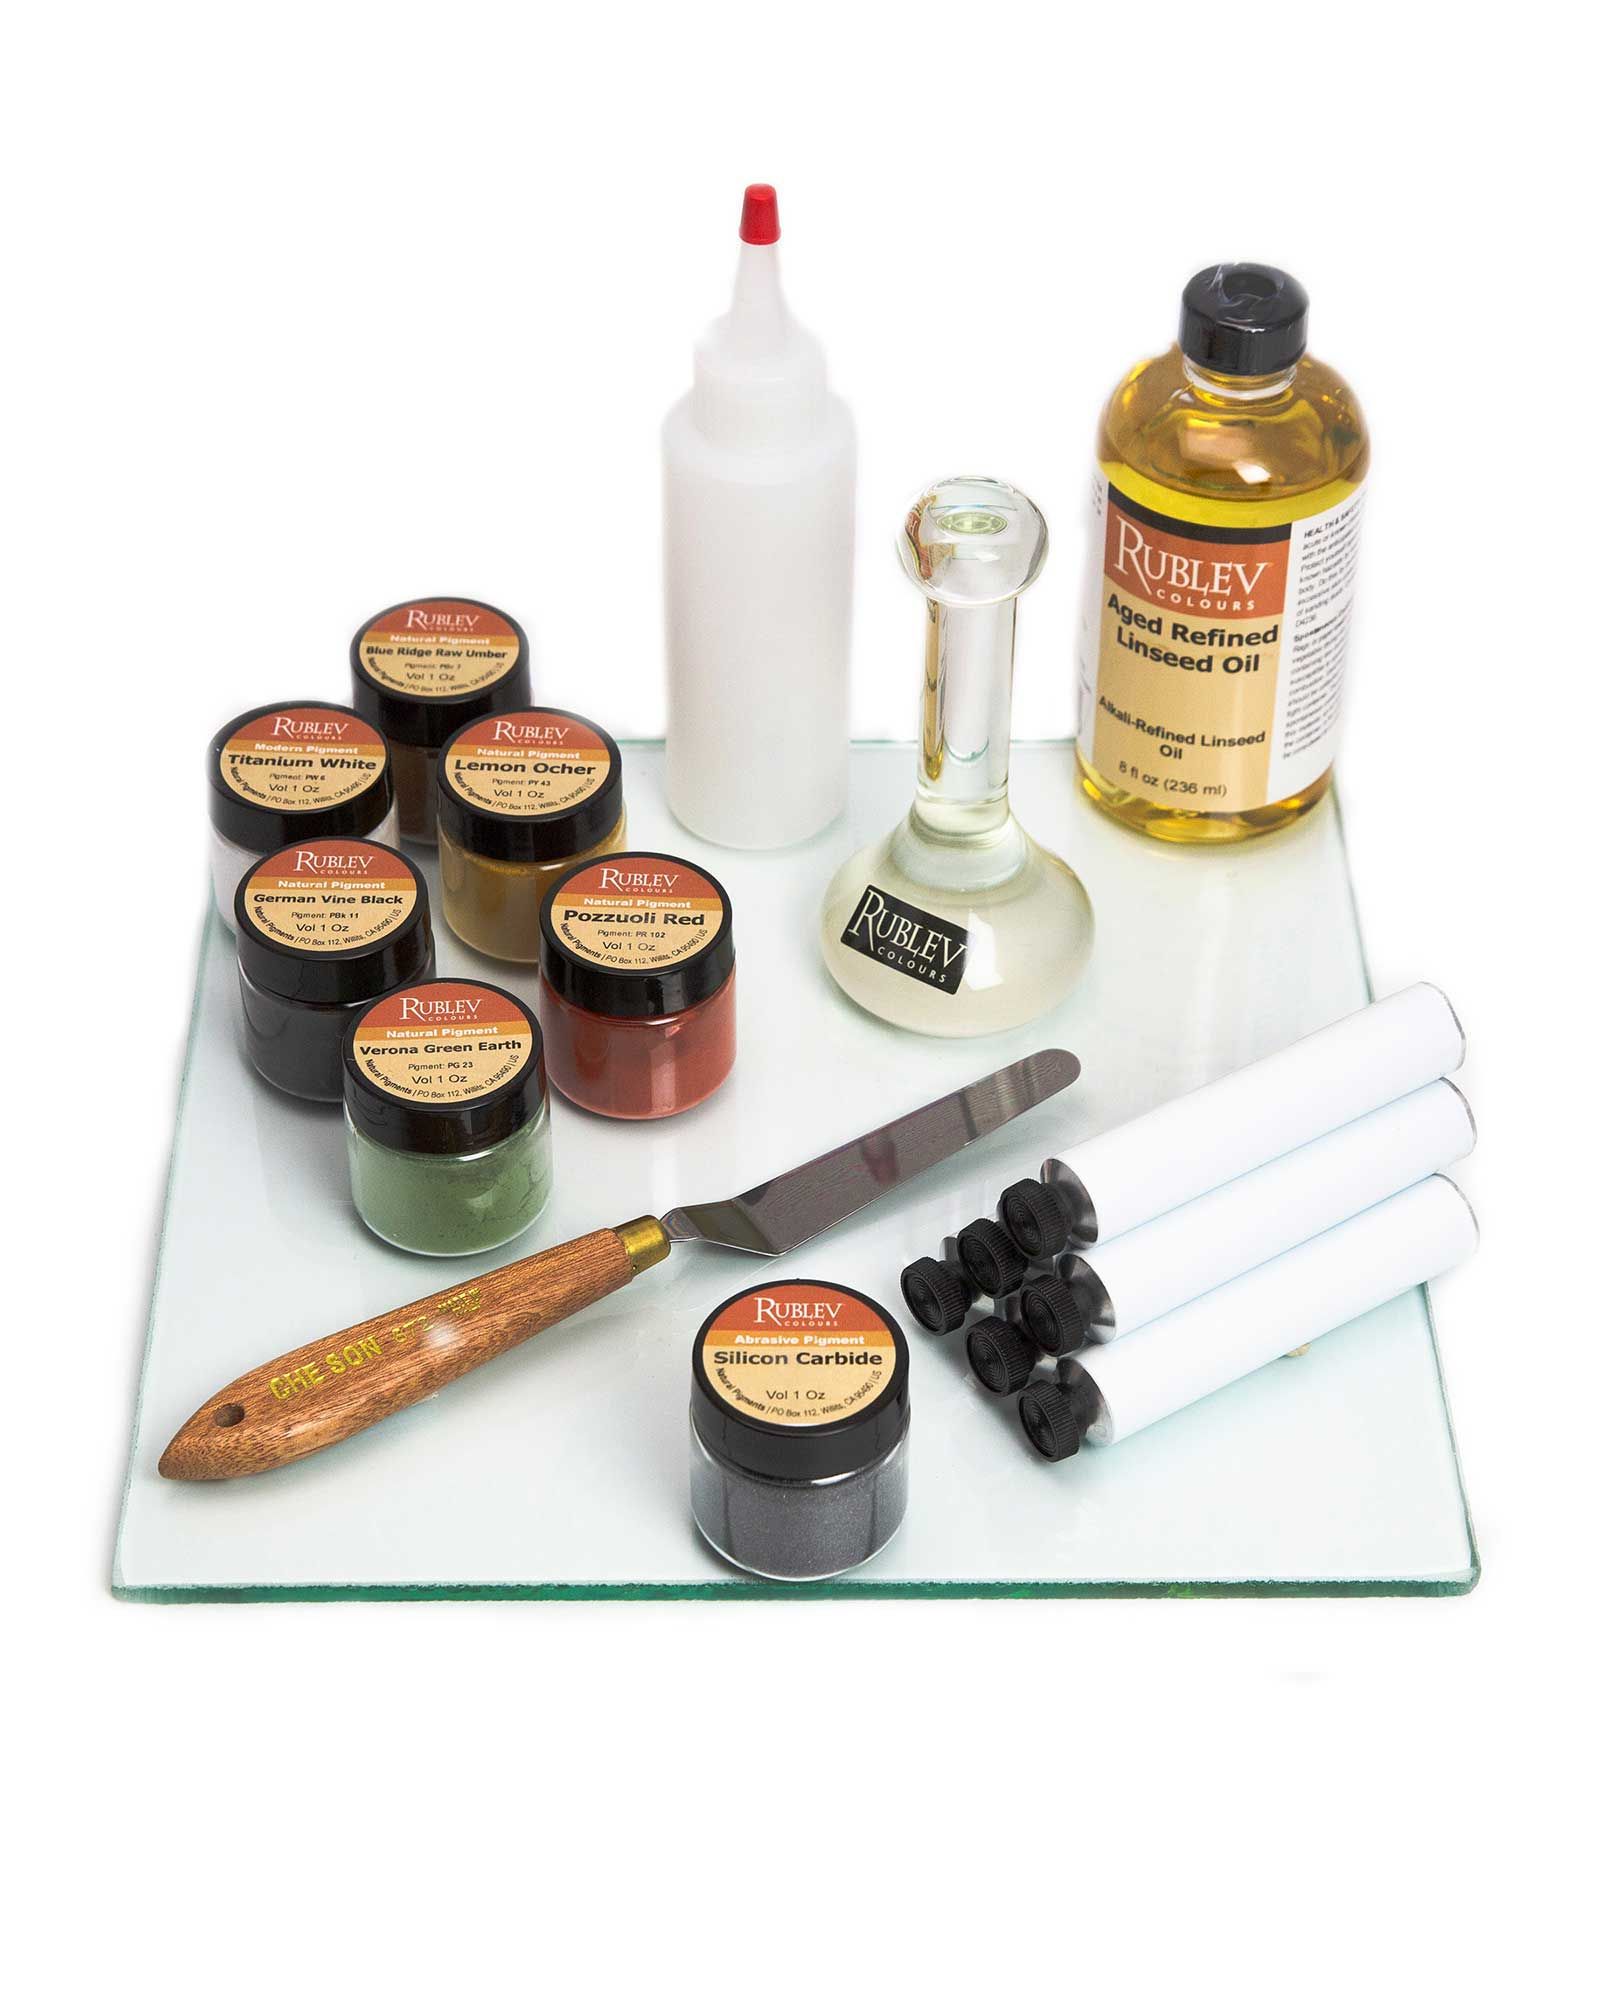
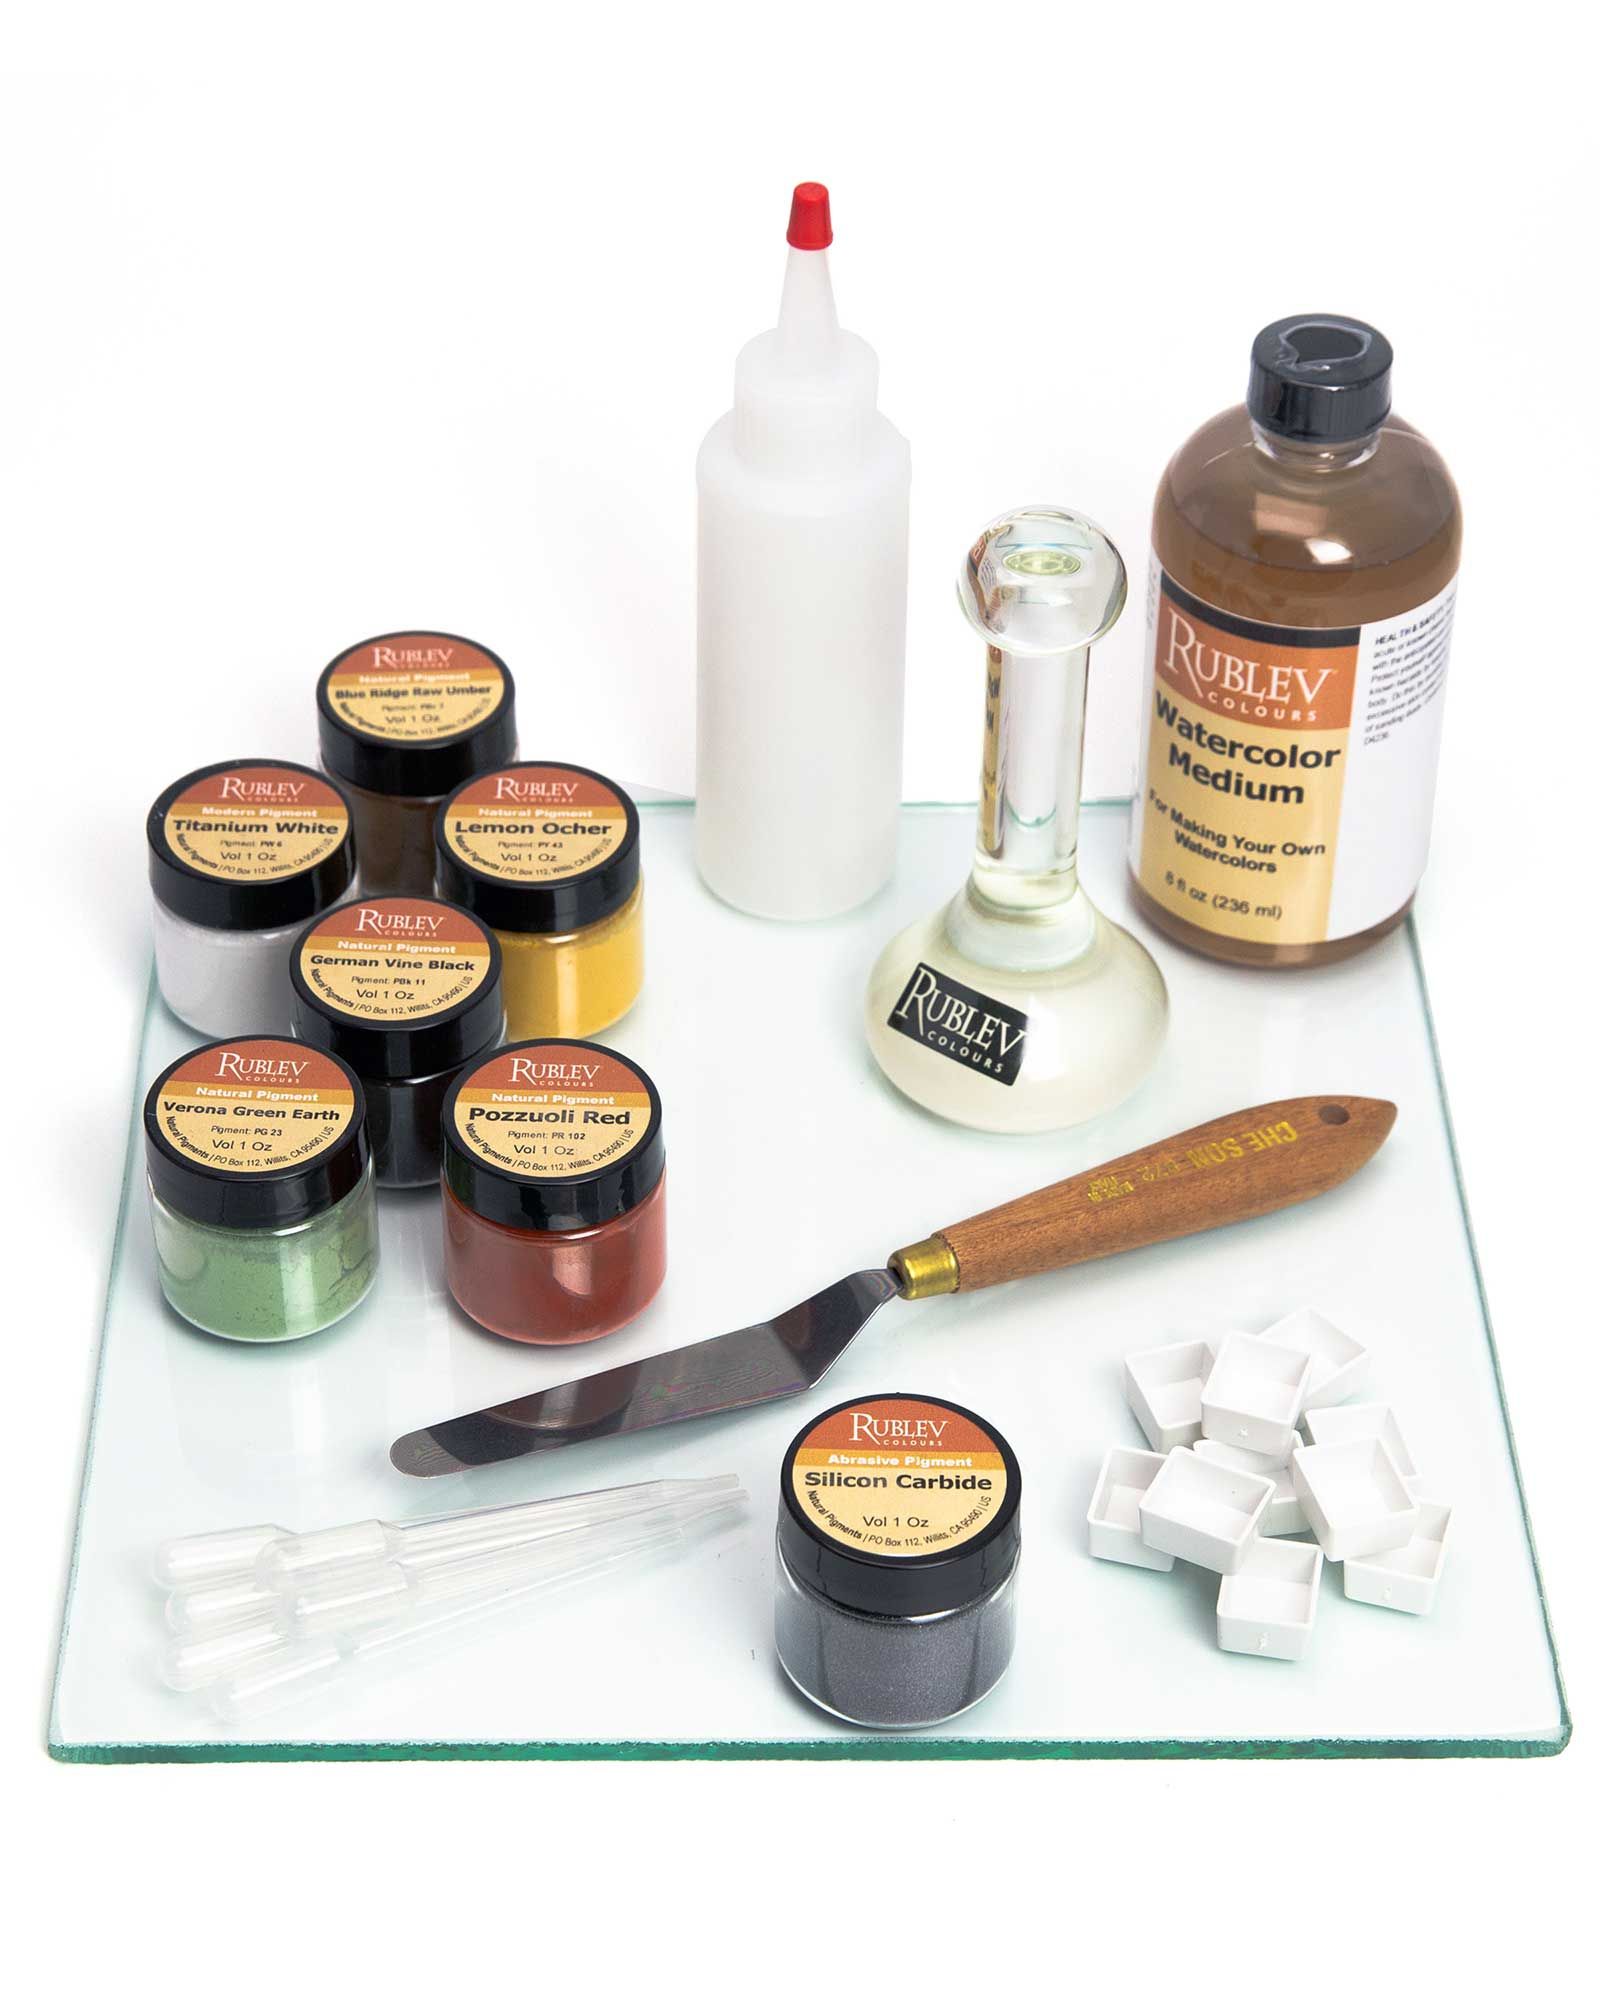
Paint Making Kits
Natural Pigments Paint Making Kits contain everything you need, including instructions, to start making colors in your favorite medium. In addition to the items listed in the, you also get the following items:
Oil Paint-Making Kit
Linseed oil, eight fl oz
Collapsible tubes (20 ml), six each
Making Oil Colors instructions


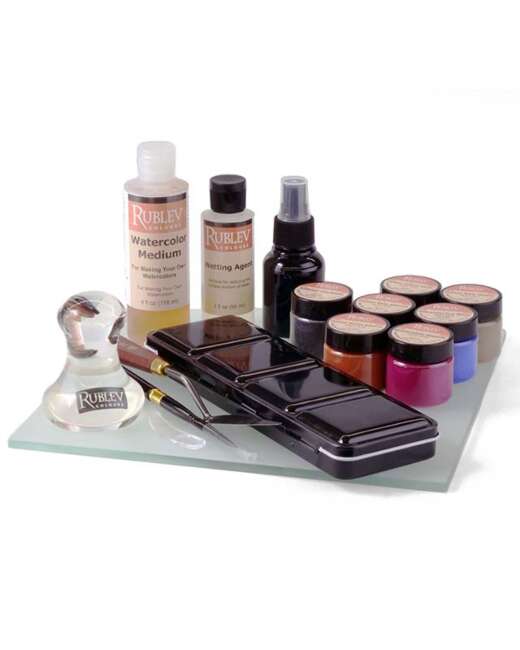
Watercolor Paint-Making Kit
Watercolor medium, eight fl oz
Collapsible tubes (20 ml), six each
Making Watercolors instructions

Dispersing Pigments in Oil
Although many pigments have a natural affinity for oil, some pigments are more difficult to disperse. The reason is that these pigments are lipophobic (literally ‘oil hating’) and must be coaxed to become thoroughly wet by the oil. For these pigments, such as organic colors, a small number of mineral spirits can help to wet the pigment before grinding with oil.
Mix the dry pigment with a small number of mineral spirits using a spatula until it forms a dry, crumbly mass. The purpose is to wet the pigment particles. Allow some of the mineral spirits to evaporate before continuing to grind the pigment in an oil or paint medium.
Adding Wax to Oil
Some pigments, such as lapis lazuli or ultramarine, become stringy after grinding or runny during storage. However, you may grind the pigment to a stiff paste, and in a short while, it will be runny. These pigments may benefit from adding a small amount of wax to the oil—up to 4% wax—2% is usually sufficient. The following method makes oil with 2% wax; however, you can adjust the quantities to suit your needs.
Step 1: Heat 250 ml (8 fl oz) of oil in a double boiler.
Step 2: Add 30 g (1 oz) of white beeswax and stir until melted. Once mixed thoroughly, remove from the heat and cool.
Step 3: When cool, prepare 1 liter (1 quart) by adding 750 ml (24 fl oz) of room temperature oil while stirring. Allow standing for a day before using. Store the wax-oil medium in a tightly closed bottle with a narrow mouth.
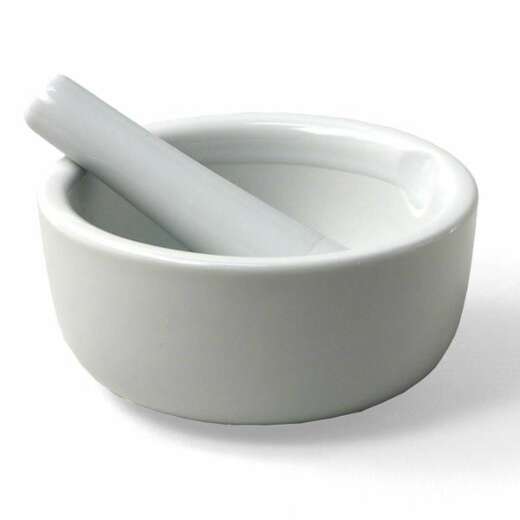
Heat the wax-oil medium before mixing it with the pigment. Pour it into a hot porcelain mortar, add pigment and grind it with a pestle until smooth. Grinding may then proceed on a flat surface with a muller.
The mortar can be heated by submerging it into boiling water. After the mortar is hot, remove it from the water and dry it thoroughly. Porcelain will retain heat for some time. Heat is needed to ensure the uniform distribution of the wax in the oil.
Complete Courses on Paint Making
Painting Best Practices has complete online courses on making watercolors, oil paint, and more. Learn more.
Frequently Asked Questions
What are the 3 ingredients to oil paint?
The typical answer to this question is three main ingredients of oil paint are pigment, a binder (usually oil), and a solvent or thinner. Pigment provides color, oil binds the pigment, and solvents thin the paint to the desired consistency. However, oil paint only requires two ingredients: pigment and oil. The solvent thins the consistency of the paint to a fluid for applying in thin layers or staining the painting substrate.
Why is oil-based paint illegal?
Oil-based paint is not universally illegal but is regulated in some areas due to its high volatile organic compound (VOC) content, which can be harmful to the environment and human health. Regulations often promote the use of water-based or low-VOC paints instead. However, these regulations do not apply to artists' oil paints which do not typically contain solvents and do not have to be used with solvents of any kind.
What did artists use before oil paint was invented?
Before the invention of oil paints, artists commonly used tempera, made from egg yolk mixed with pigments, fresco, which involves applying pigment to wet plaster, and encaustic, a painting medium consisting of beeswax and pigments applied in a molten state to painting supports such as wood. These methods date back to ancient times and were prominent in medieval and Renaissance art.