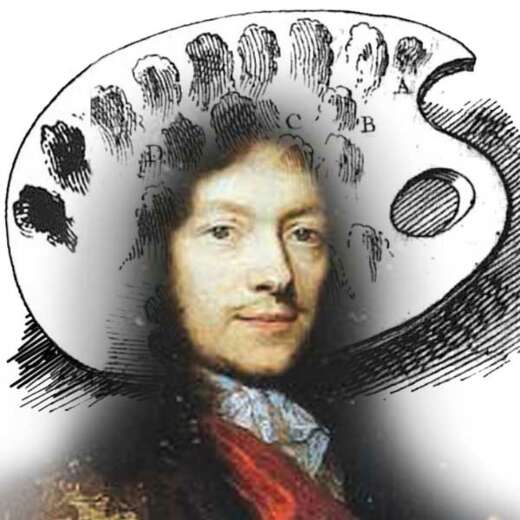
 Roger de Piles (pronounced “day peel”) was a French painter, engraver, art critic, and diplomat who lived in the latter part of the 17th century. Born in Clamecy on 7 October 1635, de Piles started his career in art as a pupil of Claude François. In 1662, he became tutor to Michel Amelot de Gournay, whom he was to follow throughout his life, acting as secretary to his various missions as French ambassador to Venice, Portugal, and Spain. While in Venice (1682–1685), he started a famous collection of prints, drawings, and paintings of Giorgione, Correggio, Rembrandt, Claude Lorrain, Rubens, Antoine Coypel, and Jean-Baptiste Forest. In 1705, he followed Amelot de Gournay to Spain, but illness forced him to return to Paris, where he died on 5 April 1709.
 Roger de Piles’ significant contribution was the aesthetic theory espoused in his Dialogue sur le Coloris (“Dialogue on Colors”), in which he initiated his famous defense of Rubens. In this argument, he introduced the term “clair-obscur” (chiaroscuro) to highlight the effect of color in accentuating the tension between light and dark in a painting. In his defense of Rubens, he ranked him highest among a list of 56 major painters of his time with whose work he had acquainted himself.
Among his literary works, de Piles translated Charles Alphonse Du Fresnoy’s De Arte Graphica (1668) from Latin to French and added additional comments to the text. These notes are embodied in his book, Les Élémens de Peinture Pratique (1684).
The chapter entitled, De la Peinture à huile, discusses oil painting techniques with an emphasis on the layout of the artist’s palette. The following is a partial translation of chapter four of de Piles’ Les Élémens de Peinture Pratique and notes that explain the instructions:
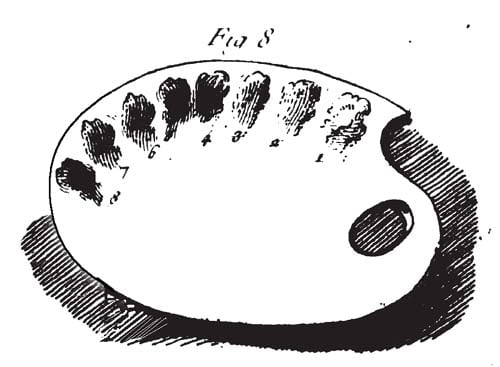
Figure 8
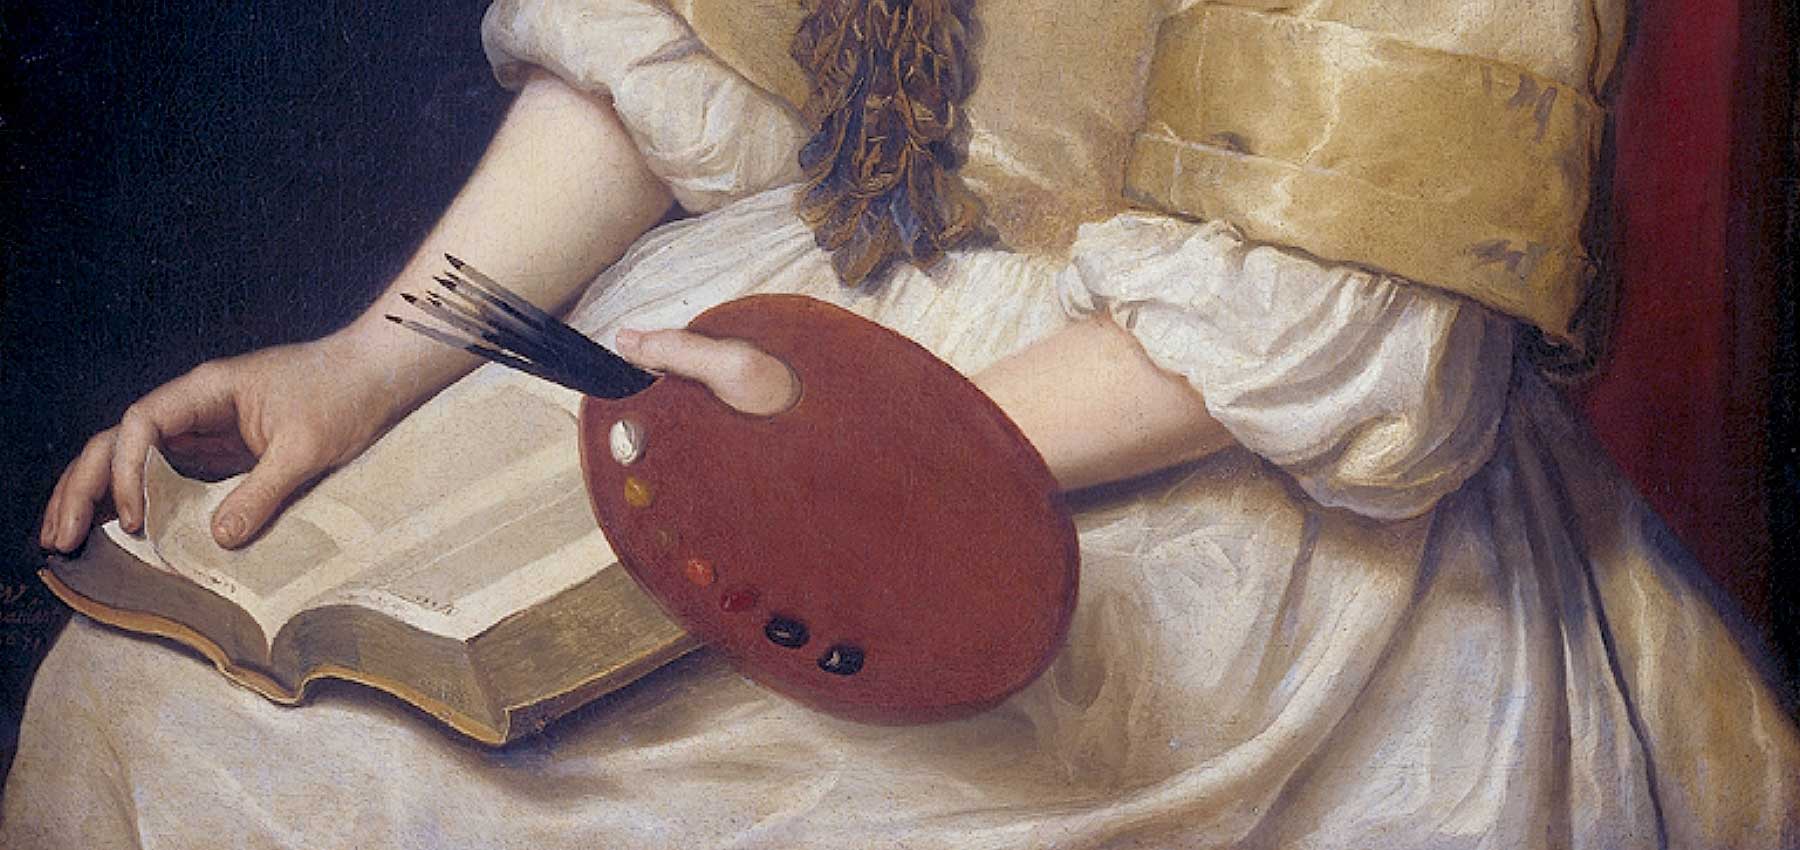
Arrangement of colors on the palette.
As we have seen before, we arrange the shades of colors in ranges at the top of the palette, observing to place the lightest colors nearest to the thumb and in small piles separated from each other. With the colors placed in order in rows, we take the palette in the left hand and support it on the thumb in a hole made for it at the bottom. In the same hand, we hold the brushes that will be used. The same hand can also hold the mahl stick or the hand-support, and the torch brush, which is a small piece of cloth used to wipe the ends of brushes, and the knife, which mixes the colors on the palette when they are needed.
In oil painting are usually used eight principal colors: almost all others are derived and are composed of a mixture of these. They are arranged in a range roughly this way. 1. White lead. 2. Yellow ochre. 3. Brown red. 4. Lake. 5. Stil de grain. 6. Green earth. 7. Umber. 8. Bone or ivory black. These are the names of the eight colors and the order in which they are almost always placed on the palette. See fig. 8.
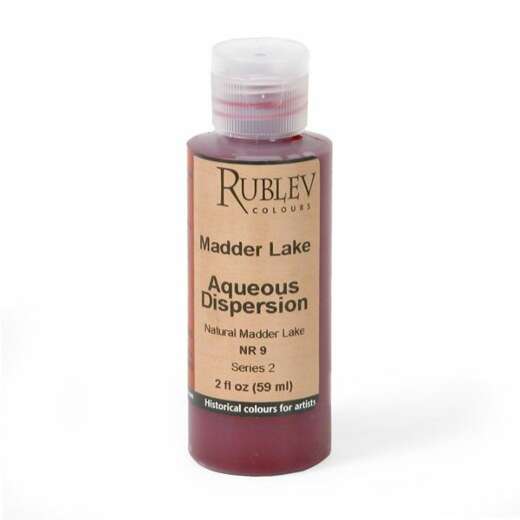
The color names in the Rublev Colours® Artist Oils that correspond to the colors in de Piles’ painting treatise are: 1. Lead White. 2. Lemon Ocher. 3. Venetian Red. 4. Madder Lake. 5. Italian Sienna. 6. Verona Green Earth. 7. Cyprus Umber Medium. 8. Bone Black. These colors are available as part of the Roger de Piles Flesh Tone Palette |
These colors are sold crushed, and to keep long and clean, they are kept in portion of a pig bladder, which makes it handy and flexible by rubbing with a little water, and in small packages bound with a string. To make use of the color, it is withdrawn through a small hole made with a big pin and, by pressing the package, you can bring out roughly the amount that must be used on to the palette.
There are other colors that are sold in powder and that temper with the knife on the palette by mixing with a little oil, only when needed. These colors are ultramarine, German blue ash, vermilion, massicot, carbon black, and others that are not of great importance and through use learn to know.
The Rublev Colours Artists’ Oils corresponding to natural ultramarine is Lazurite; German blue ash, Azurite; massicot, Lead-Tin Yellow; and carbon black is Bone Black.
Of tints and mixtures of colors.
It is not possible to give rules on the mixture of colors, but with use and a little practice you can learn more than from long speeches, but in order to provide those who are starting to paint all the facilities that depend on us, we recommend to copy your first head from one that is beautiful, fresh and well-colored; this is the best advice we can give, because good beginnings leave long lasting impressions in the mind of the things copied. There are painters who, having started to copy in gray tones, do so for their remaining lives. Suppose that it is a question of copying a head of fresh and live flesh tones.
Before beginning to paint, all the major shades that are needed to imitate what you want to copy should be placed on the palette with the tip of the knife. The shades are made by taking a little of the principal colors that are at the top of the range with the tip of the knife and mix them together until we have found the shades that we seek. The natural flesh tones have their light, their shadows and their reflections or halftones, but to imitate these three degrees the painter mixes the colors, making different shades on the palette. They arrange them in order to each other, below the eight principal colors, always putting the brightest nearest the thumb holding the palette: as we have already said, these shades should be mixed with the knife, which would be the wrong way to do with a brush.
Returning to the proposed head: it has its light, its shadows and halftones. To imitate the light, there are usually four light shades. The first is composed of white and a little yellow; the second, white, vermilion and lake, the latter two being added in very small quantities. The third is like the second, by putting a little more lake and vermilion; the fourth, like the third, by mixing a little more of the last two colors. It may be here that we want to make a fifth shade darker than the latter. These shades are set forth in a single row; the halftones and shadows placed underneath.
There are usually three halftones: make the first by mixing white with some yellow, some lake and a little ultramarine. The second, like the first, make by diminishing the white and increasing the three others. The third, as the second, make by further decreasing the white and similarly increasing the three other colors.
The shades for shadows start from the halftones: just make two. The first consists of lake, yellow ocher and ultramarine, making sure to use more yellow than the other two. The second is best with stil de grain, lake and a little bone black. Let’s now show a summary of the arrangement of all these colors on the palette, as seen in fig. 9.

Figure 9
The eight principal colors occupy places at the top of the palette. The eight colors are, as we have already said, white lead, yellow ocher, brown red, lake, stil de grain, green earth, umber, bone black; you can add carbon black that for some uses is better than another. The shades to paint the flesh tones place below these principal colors and arrange in two rows: those for light values above and those for halftones and shadows below, always observing to put lighter colors nearest the thumbhole. Between these two rows, it is worthwhile putting a little yellow, because you will need it often, and it is more convenient to take it from this place with a brush while painting than to blend with hues from which it was prepared. It is marked by an E in figure 9.
For the other colors, such as fine lake and vermilion, ultramarine and massicot, put them where you want, however, for more convenience, put the vermilion next to and below the white, as seen in A, all it takes to become saturated is a very small amount and that has little business in flesh tones. The massicot might well be placed below and next to a bit of yellow ocher, as in B; the fine lake is marked C, below and a little beside the coarse lake; and ultramarine in the place marked D.
We should not pretend that all these shades are in the places they should be to produce the effect we desire, and to make the head exactly as the original we propose to imitate. They are made up only to facilitate the mixture that we should paint with next. Because when something does not tint the color you want, we must put the brush aside and what it lacks, and finally make it as it should be, increasing or decreasing one or another color.
As regards the mixture of colors and the effect they produce with each other, there is little that experience cannot teach you. I warn you, however, that unless umber serves you, it spoils the other colors, and it is good only to make brown backgrounds, brown draperies, and in a few places.
When you have some cloth or some other thing to paint, which has its light, its shadows and halftones, they must be prepared on the palette with four or five shades, mixing with the main color on which you wish to paint drapery, a light color for the light, and a brown color for the shadows and that by degrees. It should be noted, as has already been said, that the lightest hues on the palette place nearest to the side of the thumbhole, and the other colors then away as they become darker.
The instructions provided in this article focus on making flesh tones for painting faces and figures.
Unlike the typical practice today, 17th century painters mixed their colors before placing them on the palette. Flesh tones are developed from three ranges of color mixtures based on tonal value: highlights, consisting of the lightest values of the painting; halftones, the middle values; and the darkest values, the shadows. Mix the tints with a knife or spatula before placing them on the palette. Do not use a brush later to be used for painting to avoid dirtying the colors.
It is recommended to prepare your colors on a sheet of glass to make mixing and cleaning easier. The sheet of glass should be laid over a surface similar in color to the ground of picture, not white, to accurately judge the values of your mixtures.
The following explains how to prepare the flesh tone palette according to 17th century practice:
Highlights
Prepare three or four highlights for the lightest areas of flesh. To make the first highlight, add a very small amount of Lemon Ocher to a pile of Lead White the size of a hazelnut. To prepare the next three highlights, squeeze out a sufficient amount of Lead White onto the glass to divide into four small piles. For the second highlight, add a very small amount of Madder Lake (Alizarin Crimson) and Vermilion to the pile of Lead White. Separate a portion of the mixture as the second highlight. To the original pile, add a little more Madder Lake (Alizarin Crimson) and Vermilion for the third highlight and separate a portion of this mixture. For the fourth, mix in a little more of the last two colors into the original pile to form the last highlight. Each highlight is slightly darker in value than the previous, keeping in mind that these form the highlights of flesh so their values are much higher than the middle value.
Halftones
Prepare three halftones of flesh. Place a large pile of Lead White, enough to make four piles of color nearly the same size as the piles of highlights, onto the glass. Add a small amount of Lemon Ocher, Madder Lake Alizarin Crimson) and a smaller quantity of Lazurite (Ultramarine) to achieve a value darker than the last highlight. Remove a portion of the pile—about one fourth—to make the first halftone. Add more Lemon Ocher, Madder Lake (Alizarin Crimson) and Lazurite to the original pile. Remove another quantity from this pile for the second halftone. Once again, add more Lemon Ocher, Madder Lake (Alizarin Crimson) and Lazurite (Ultramarine) to the original pile. Separate a portion from the pile to make the third middle tint.
Shadows
Now prepare two shadow tones. Add more Lemon Ocher, Madder Lake and Lazurite to the original pile used to prepare the halftones in the previous step, making sure to add Lemon Ocher in larger quantities than the other two. For the second shadow tone, squeeze out more Lead White onto the glass and add Italian Sienna, Madder Lake (Alizarin Crimson) and a small amount of Bone Black to make a tone darker in value than the first shadow.
Arrange the principal colors in one row along the top edge of the palette; place lead white nearest the thumbhole and the other colors of lightest to darkest value from right to left: 2. Lemon Ocher. 3. Venetian Red. 4. Madder Lake (Alizarin Crimson). 5. Italian Sienna. 6. Verona Green Earth. 7. Cyprus Umber Medium and 8. Bone Black. Place the highlight tints in a row from right to left in order of the lightest to darkest values below these colors. In figure 9, the four highlights are shown in the middle of the palette. Next, place the halftones and shadows in the bottom row from right to left in the same sequence of light to dark values. Squeeze out a pile of Lemon Ocher between the two rows of tints, marked by E in figure 9.
Place a small dab of Vermilion to the right of Lead White, indicated by A. If desired, place some Lead-Tin Yellow below the Lemon Ocher as shown at B. It is uncertain what de Piles meant by coarse lake and fine lake, but coarse and fine lake may refer to different hues of Madder Lake one more intense and saturated than the other, or coarse lake may refer to Indian Lake (lac lake), and fine lake to Madder or Cochineal Lake, which is a brighter, more intense color. Drop a small amount of Lazurite (Ultramarine) below the madder lake marked by D.
In painting manuals of this period and later until the 19th century, emphasis is given to preparing colors before starting to paint and, if a color is needed while painting that has not been prepared beforehand, mixed not on the palette, but prior setting on the palette. Following this advice, helps to avoid contaminating color mixtures with the resulting dirty tints.
Prepare separate palettes for painting other areas of the picture, such as cloth, interiors, landscapes, etc.
Manner of sketching and dead-coloring a painting.
As an oil painting is usually painted on canvas or on walls where the picture is brown, one begins to sketch by tracing the outline of figures and draperies with a pencil made of white chalk, which can be easily erased with a white cloth or a sponge moistened with a little water. Then retrace the same contours with a hue that is the local color of each thing: for example, flesh tones; lake is used with a bit of green earth or umber, or some other color that serves the union, which promptly dries and that is not incompatible. Retrace the contours of similar looking draperies with one of their hues: then complete the void with other colors, the lights and shadows, and finally make the underlayers of the picture—the so-called proper dead-coloring (ébauche in the French text—Ed.). Let this painting dry, after which we can finish with the same colors or lighter or darker colors. Start from the top of the picture, from left to right, as when writing, if the painting is very high on rollers, or built if it is mounted on stretcher bars.
This picture underpainting serves only to cover the canvas with colors and to see the effect, but it must be done properly and all colors must be as well placed as possible: for this purpose, it is necessary that the design be well fixed before starting the picture. For if one puts a finishing brown on light, unlike red on blue, or colors very different from one on another, the last layers still lose their sparkle upon drying. When one wants to make changes, it requires repainting several times to give more substance to the last color, which must remain.
The fact that some colors seem fresh at a point or they do not retain their long-time beauty and their brilliance sometimes creates turmoil for the painter. Placing colors together, he finds that some alter and corrupt others, dulling, so to speak, their edge and their liveliness. That is why we must use them cleanly and in layers, as we just said, the main colors each in their place, without blending with a small paintbrush or with a wide brush to preserve individuality between the two; finally, we unite rather than by applying friction. Another critical attention is not to mix colors together that are incompatible, or are able to corrupt others with their extreme heaviness, such as black, or their poor quality, such as lampblack, verdigris and a few others that we must use by hand, if one is to use force. And even when it is necessary to give more power to some parts of a painting, you must wait until it is dry, if you want to apply colors that can harm the paint layers. There are painters who do all these observations, they are nevertheless very necessary to keep the beauty of colors.
Those who work with judgment, every color is applied with small strokes without haste, the flesh tones they make thicker, covering and recovering several times, what painters call well thickened. The oil colors have the advantage of being able to mingle easily with the handling of the brush, but it is feared that with the strength to torment colors you do not do lose their freshness, especially in flesh tones, and that they do not become dirty and earthy. That is why in order not to spoil the shades of colors by drowning them in each other; there are painters who end up breaking up individual shades, which admirably succeeds in master works.
To avoid this problem, there are two things to observe: the first is to get accustomed to paint and blend colors promptly and with lightness of brush, with strength, if possible not pass the same place twice. The second is that, after so slightly mixing colors together, we must take care not to brush over pure and fresh colors, which are correct for the places where they are placed, and which are the same tones as those that have already been painted and mixed underneath. To learn how to paint with strength, there is nothing better to do than to copy a few works of Correggio and Van Dyke for the lightness of brush strokes, and others, Paul Veronese and Rubens, for the purity of colors.
Color applied over a painting, when it is pure, without touching others underneath; retain their brightness in the passage of time. That is why we do not approve the use by a few painters who finish their pictures over the underpaintings by putting some color and much oil, as if glazing; sometimes using oil of turpentine to make color more easily: it is true that this way expedites the work, but it is a dangerous practice to follow. Indeed, these pictures do not seem to be more than colored fog and without any vivacity, because too much oil, mainly that of turpentine, absorbed and killed the colors.
It is unnecessary to point out that, to paint in good grace, one must use a brush as long as is possible and be right in his seat, however without constraint, and at a reasonable distance from one’s work; one paints much more freely. On the contrary, there is nothing more than bad grace to use a short brush and too close to the nose, as they say, on one’s work.
Sketching and Underpainting
The white ground of 17th-century paintings was often covered by a thin coat of warm brown color, typically a mixture of red earth and umber pigments. The value of the ground was typically in the middle between black and white, which helped to make building the values of the painting easier. Over the ground, outline figures in white chalk. Retrace the outlines with local color. For example, to draw the contours of the face of the figure, prepare a fluid paint of madder lake and umber so that it dries quickly. Mix the colors together and add a fast drying medium, such as Rublev Colours Medium, to make a flowing paint. Trace over the chalk outline with this paint. Fill in this outline with a halftone of flesh color thinned with this medium. Complete the remainder of the painting in the same manner, outlining each subject and filling it in with a local color. The underpainting or dead-coloring is complete when the subject of the picture is roughed in with large blocks of color.
It has been often observed that 17th-century painters used less expensive pigments in the underpainting of the picture and switched to costly pigments in the final layers.
Source
Roger de Piles. Les Élémens de Peinture Pratique. Charles-Antoine Jombert, editor. Arkstée & Merkus, 1766, pages 97–113.