According to Evgeniï Trubetskoï, “the mysticism of icon painting is primarily solar, in that word’s highest spiritual sense. However beautiful the sky’s other colors may be the gold of the midday sun remains the color of colors and the miracle of miracles.” [1]
In icon painting, this divine gold is used uniquely. Gold hatching is a technique of creating fine lines in gold over painted areas of an icon painting. It never looks like solid gold; it resembles an unearthly, airy cobweb of delicate rays emitted by God and lighting everything around. God is always suggested as its source when it appears in an icon. However, in the presence of divine illumination, gold hatching often glorifies the part of the scene that has already entered divine life and is seen as touching it very closely. For instance, it covers the throne, the brilliant robe of the glorified Christ [2] (fig. 1), and the Virgin’s mantle as she ascends to heaven. Angel wings and the tops of paradisiacal trees are often touched with it. In some icons, gold hatching appears on the pointed domes of churches, never covering them, but making them glitter with rays. The ethereal quality of the rays of gold gives the icon’s surface the appearance of live, glowing, moving light.
![]()
Fig. 1. Christ Enthroned in Glory by Andrei Rublev, 1400–1410, in the collection of the Tretyakov Gallery, Inv. No. 22124.
In general, gold hatching is used in icon painting with discretion. Gold hatching does not appear in icons where Christ’s humanity is stressed, where he “took upon him the form of a servant.” But as soon as the artist sees Christ in glory or wants to convey his imminent glorification, he introduces gold hatching.[3] Christ as an infant often glows with it when the artist needs to emphasize the eternal nature of the Child. This delicate gold covers the garments of Christ in icons of the Transfiguration, the Resurrection, and the Ascension. He shines with the same specific divine brilliance when he is shown leading human souls out of hell or into paradise with the thief.
The most substantial impact is achieved by using gold hatching, where the artist needs to contrast the spiritual world of the heavens with the material universe. We can see this, for instance, in ancient icons of the Dormition. For example, in two sixteenth-century icons of the Dormition,[4] the Mother of God reclining on her deathbed in her dark clothes, remains corporeally on this plane of being, the one we can touch and can see with our earthly eyes. But the figure of Christ in light raiment, standing behind the bed with the Virgin’s soul in the guise of an infant in his arms, is a vision of heaven. The whole figure shines and shimmers, separated from the intentionally rich earthly colors by the otherworldly weightlessness of gold lines.
Brief History of Gilding in Russian Icons
The are two basic techniques of applying gold hatching: one is to adhere small pieces of gold leaf, called skewings, and the other method is to paint gold finely ground in a binder, such as gum arabic, with a brush. Both techniques begin with gold leaf.
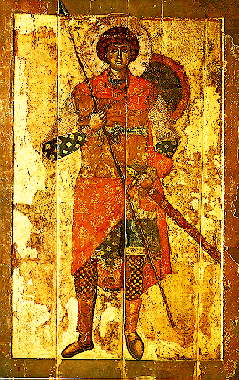
Fig. 2. Saint George the Great Martyr, 12th century from the Cathedral of Saint George at the Yuriev Monastery in Novgorod. Egg tempera on limewood board overlaid with canvas, 2.30 X 1.42 m, in the collection of the Tretyakov Gallery.
Gold and silver are forged into thin leaves called “gold leaf” and “silver leaf.” Until the last century, extremely thin sheets of gold and silver were forged by hand from annealed metals. For gilding, artists mostly use nearly pure gold, measured in karats—24 karats being pure gold. Gold leaf is available in many tints—from greenish to reddish—depending on the amount of silver and copper admixtures. Higher gold content and a more significant amount of copper results in deeper tones of gold leaf. For example, 23 karat gold leaf is composed of 96% gold, 3% silver, and 1% copper. The higher karat leaves are also more durable due to the higher gold content, which does not tarnish and oxidize. Gold is alloyed with more significant amounts of silver or other metals to achieve lighter colors in the lower karats of gold leaf, such as 18, 16, and 12 karats.
In the earliest Russian icons, from about the tenth to fourteenth centuries, gold is of greenish tint because of its high content of silver. The gold leaf is also thicker than the gold leaf of icons of the fifteenth and sixteenth centuries. Such greenish gold can be seen in icons of the twelfth-century Saint George the Great Martyr (fig. 2) shoulder-length Deisis and on other icons up to the fourteenth century. After that period, gold leaf in Russian icons was thinner and bright yellow or reddish because it contained small amounts of copper. From the sixteenth-century Russian icon, painters began to use another type of gold leaf—dvoinik—two thin sheets of gold and silver forged together. The upper side of dvoinik is gold, while the lower side is silver.
Silver leaf was not used often in icon paintings. The earliest known example of easel painting using silver is in the halo of Saint Nicholas in the icon Saint Nicholas the Miracle-Worker from the Novodevichi Monastery in Moscow. This icon was dated at the beginning of the thirteenth century and is now located in the Tretyakov Gallery.
Imitation silver leaf using tin and gold with copper are not often found in ancient icons. One notable example, however, is found in the icon of the Mother of God of Tolga from the beginning of the fourteenth century, now at the Tolga Monastery near Yaroslavl, which background was covered by sheets of tin instead of silver. Tin covered with a glaze of ochre oil paint or yellow varnish is frequently encountered in nineteenth and twentieth-century icons.
The technique of applying gold hatching, often found in ancient Russian icons is by grinding gold leaf in a gum base. In ancient Russian art, all paints were originally called tvoryoniye (from the word tvorit, meaning “to grind”). Since the nineteenth century, however, only gold and silver paints were called tvoryoniye.
Materials Needed to Make Gold Paint
To prepare gold for painting, it must be mixed with a binder—gum arabic and water—to make a thick, viscous fluid. For this procedure, we shall need the following items:
- Gold leaf (about ten loose leaves)
- Gum arabic (prepare into a solution)
- Water (preferably distilled)
- Saucer or shallow bowl
The quantity of gold necessary to prepare one portion of gold paint is usually ten leaves. It is the most suitable portion for the grinding process to produce high-quality gold paint.
To prepare the gum arabic-water solution, you will need approximately one part of water to equal amounts of gum arabic. The actual proportions here are not critical, but what is vital is that the consistency of the gum-water solution should be like thick honey. In a double boiler, heat the water and stir in the gum arabic. Powdered gum takes less time to dissolve then lumps, but complete dissolution still requires about two to three days. After the solution cools, cover and leave it until the solution is clear and the gum is wholly dissolved, strain the gum solution through cheesecloth into a clean jar. Keep refrigerated when not in use, for it spoils quickly. Never heat this solution over a direct flame or heating element, for it will scorch.
Procedure for Preparing Gold Paint
The following procedure demonstrates how to make water-based gold paint. Alternatively, you can purchase a similar form of gold paint, called “shell gold,” from the Natural Pigments online store.

Fig. 1. Pour gum arabic solution into a saucer

Fig. 2. Stir the gum solution well
Pour the gum arabic solution into a clean saucer enough to cover a quarter (a U.S. coin about 2.5 cm or one inch in diameter) and stir it with your forefinger until it becomes a homogenous mass. The gum arabic solution must have the consistency of thick honey; if it is thinner, the gold pieces will form pellets.
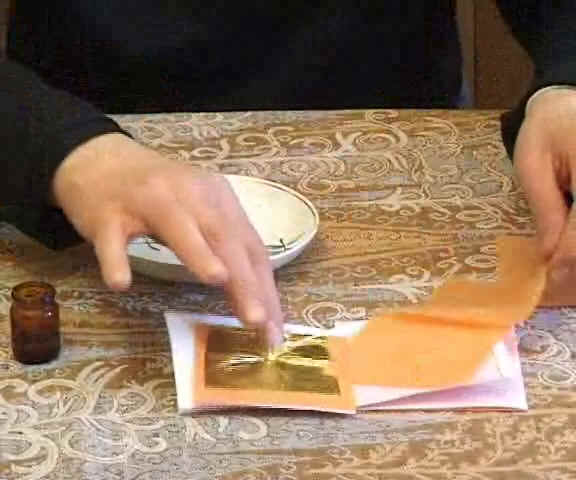
Fig. 3. Pick up a leaf of gold
With the same finger, pick up a sheet of gold leaf and drop it onto the gum arabic solution in the saucer.
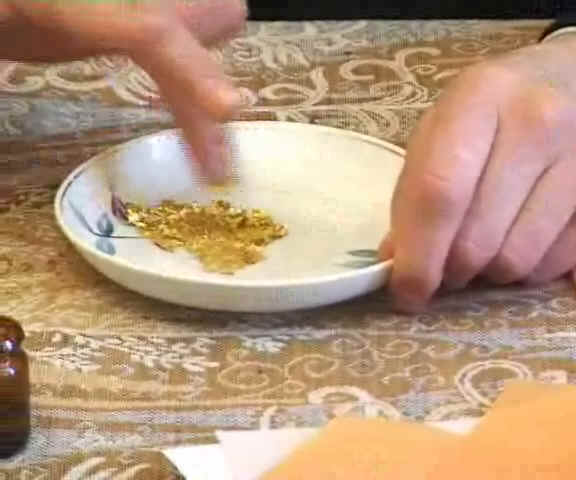
Fig. 4. Break up the leaf into small pieces
Break the gold leaf into smaller pieces by raising and pressing your finger repeatedly onto the leaf until the gold is mixed into the solution. Use only the vertical motion of your finger to mix the gold. Avoid rubbing the gold with a horizontal movement. Otherwise, it may roll into pellets and become difficult to grind. Pick up and pulverize the remaining nine leaves of gold similarly.
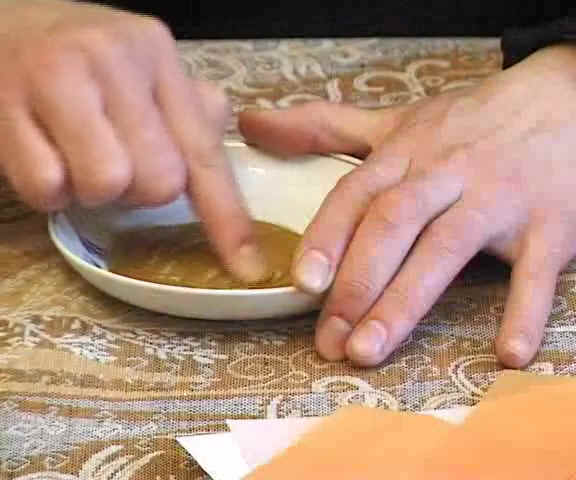
Fig. 5. Grind the gold into fine particles
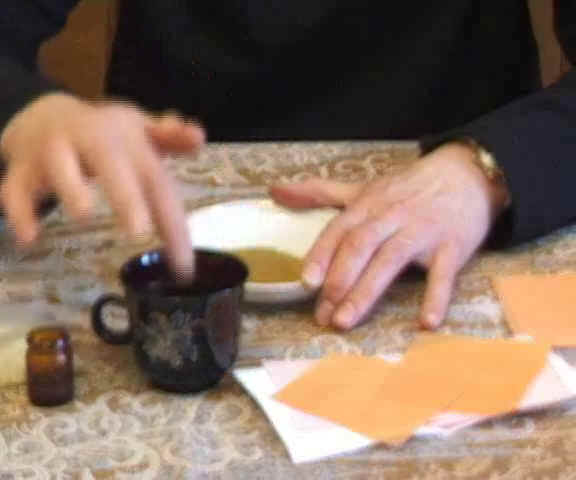
Fig. 6. Add a few drops of water, if needed
Now you are ready to begin grinding the gold into fine particles. With the same finger, grind the gold particles in the solution with a clockwise and counterclockwise motion. Applying pressure with your fingertip, grind the gold for thirty minutes. The gold will become fine particles only if the mixture has a thick consistency. If the mixture is too dry, add a drop or more water from the glass with your fingertip.

Fig. 7. Add more gum arabic solution
When you can see and feel with your finger that the gold is ground into fine particles, the process of grinding is finished. Now you can make gold paint. For this, add a little more gum arabic solution than was used at the beginning. Mix the gum arabic solution with ground gold for another fifteen to twenty minutes to make a uniform mass.

Fig. 8. Add water to the saucer
Fig. 9. Mix the ground gold well with the water
We have mixed gold with gum arabic, but it is not yet ready for use. Now for the gold to glitter after it is burnished, it is necessary to remove the excess gum arabic. To do this, fill three-fourths of the saucer with water and carefully mix it with the ground gold. Afterward, let it stand for an hour. The gold particles will settle to the bottom of the saucer. Pour off the remaining clear water. Allow the gold to dry under a lamp.
The dried gold is now ready to be applied to your painting. During the entire process, it is essential to keep the gold free from dust particles.
Inexperienced artists may find it challenging to prepare gold paint at first. They may apply it and find that it rubs off easily or does not shine after it has been burnished. There are several reasons for such failure. The first reason is that not enough gum arabic was used in the final paint, which caused the gold to rub off after it was dried. Another reason is that too much gum arabic was added—gold particles are surrounded by excessive gum and will not glitter. Even after burnishing, it may appear a dull yellowish-brown color. A third reason is that the gold was not ground fine enough to make delicate lines in the painting.
Applying the Gold Paint
To apply and finish the gold paint, you will need the following materials:
Materials Needed
- Gold paint (prepared beforehand)
- Round brush (No. 0)
- Water (preferably distilled)
- Agate “dog tooth” burnisher
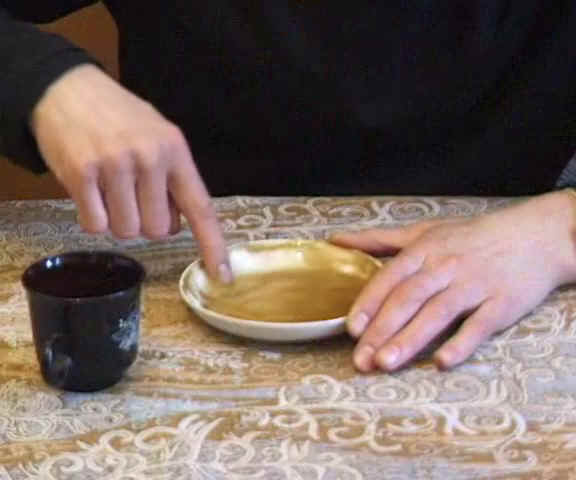
Fig. 10. Load the brush with gold paint

Fig. 11. Load the brush with gold paint
See the detail of the icon Christ in Glory for a model of how to gold paint on clothing.
Load the brush with water and squeeze out the excess on the edge of the cup. Pick up gold paint with the brush by dragging it across the surface of the dried gold paint. Apply the paint in thin, smooth brushstrokes to the highlight areas on clothing, called silki in Russian.
To model volume in the clothing, paint thin lines from silki, thick at the beginning and thin at the ends.
Fig. 12. “Feather” highlights brush strokes on the cloak of the Mother of God

Fig. 13. The method of brushing with gold paint
For painting gold highlights on the cloak of the Mother of God, a method called “feather highlights” is used. Thin lines are painted from silki in pairs, and the space between them is filled with a more transparent layer of gold.
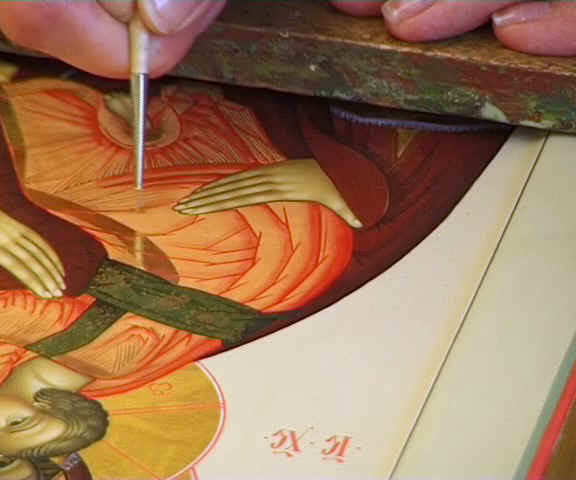
Fig. 14. “Inokop” method of painting
Another method of painting is called inokop in Russian. These thin and delicate lines are painted nearly parallel to one another from the silki.
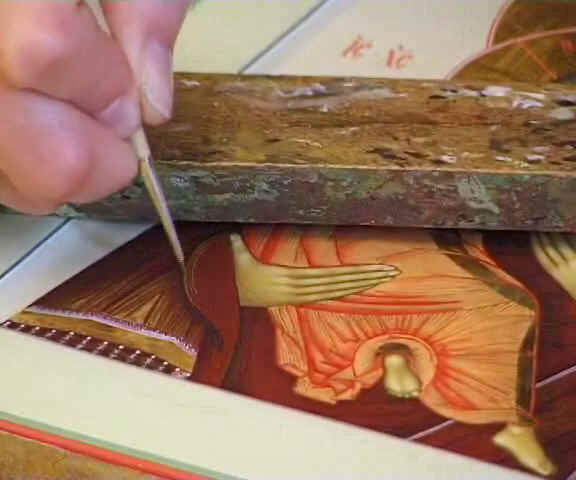
Fig. 15. Burnishing the gold hatching.
Once you have completed painting the gold, you will notice that it does not gleam like gold but appears rather dull. To make the gold shine, you must burnish it. Take the Agate burnisher and rub the gold with moderate pressure, but not too much to rub off the gold. After burnishing, the gold begins to gleam.

Fig. 16. Detail of the finished icon with gold
Notes
1. Evgeniï Trubetskoï, Theology of Color (Crestwood, New York: St. Vladimir’s Seminary Press, 1976).
2. An example of assiste on the garments of Christ can be seen in the icon Christ Enthroned in Glory by Andrei Rublev, 1400–1410, in the collection of the Tretyakov Gallery, Inv. No. 22124.
3. This method of using assiste can be seen in the icon the Six Feast Days of the Week (Shestodnev or Hexameron), Moscow School, in the Tretyakov Gallery collection Inv. No. 12058.
4. Dormition icon of the sixteenth century, Pskov School, in the collection of the Tretyakov Gallery, Inv. No. 12074; and the Dormition, Moscow School, c. 1497, in the collection of the Tretyakov Gallery, Inv. No. 28626.
Where to Buy
Shop for
Shop for
Shop for
(Note: select small size for details)Shop for